Mac Window Tiling: Every Shortcut and Method Worth Knowing
Some of the links in this post are affiliate links, which means I may earn a small commission if you choose to make a purchase at no extra cost to you. As an Amazon Associate, I earn from qualifying purchases. Read my full Ethics & Affiliate Relationship Disclaimer.
Table of Contents
Intro to Mac Tiling
macOS finally has proper window tiling, and it is a huge quality of life improvement. Instead of manually dragging, resizing, and trying to line up windows perfectly, you can snap apps into place in a couple of seconds. This is especially useful for the everyday two-app workflow: a PDF or reference document on one side and your work app on the other, or a browser next to Notes. Once you get used to it, moving windows around manually starts to feel painfully slow.
Fn+Control+Arrow Shortcut
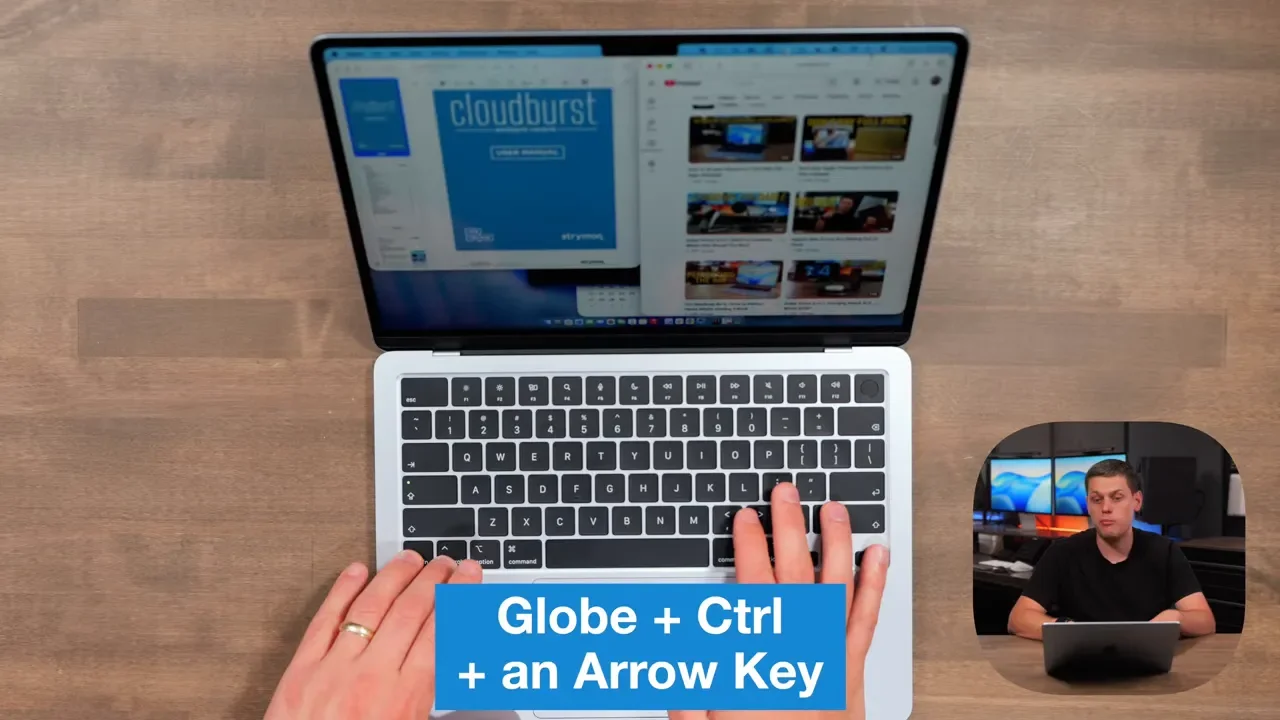
My favorite way to activate Mac window tiling is the keyboard shortcut. With the app you want to move active, hold Fn, or Globe, + Control + an Arrow key.
Globe + Control + Left Arrow: tile the active app to the left half of the screen.
Globe + Control + Right Arrow: tile the active app to the right half of the screen.
Globe + Control + Up Arrow: move the active app to the top half.
Globe + Control + Down Arrow: move the active app to the bottom half.
Whichever application is currently active is the one macOS moves. If you already have two apps tiled and want to flip their positions, hold Shift with the same shortcut. The shortcut to remember is simple: Globe + Control + Arrow for half-screen tiling, then add Shift when you want to swap the apps.
Why You Need an Apple Keyboard
There is one frustrating limitation with these shortcuts: you need a keyboard with the right Globe or Fn key. Apple keyboards have it, and a few third-party iPad keyboards include Fn, but I have not found a third-party macOS keyboard with the Globe key needed for this shortcut. That is a big reason the Apple Magic Keyboard is still my daily keyboard. If these shortcuts matter to your workflow, the Apple keyboard setup is hard to beat. For help choosing a Mac setup, check out my Mac buying guide.
Fill Screen and Center Window Shortcuts
There are two additional keyboard commands worth knowing:
Globe + Control + F: make the active window fill the entire desktop.
Globe + Control + C: center the active window.
The fill-screen shortcut is useful when you need to focus on one app for a minute. When you are finished, use an arrow-key tiling shortcut again to put that app back on one side of the display.
Quartering Windows (No Shortcut)
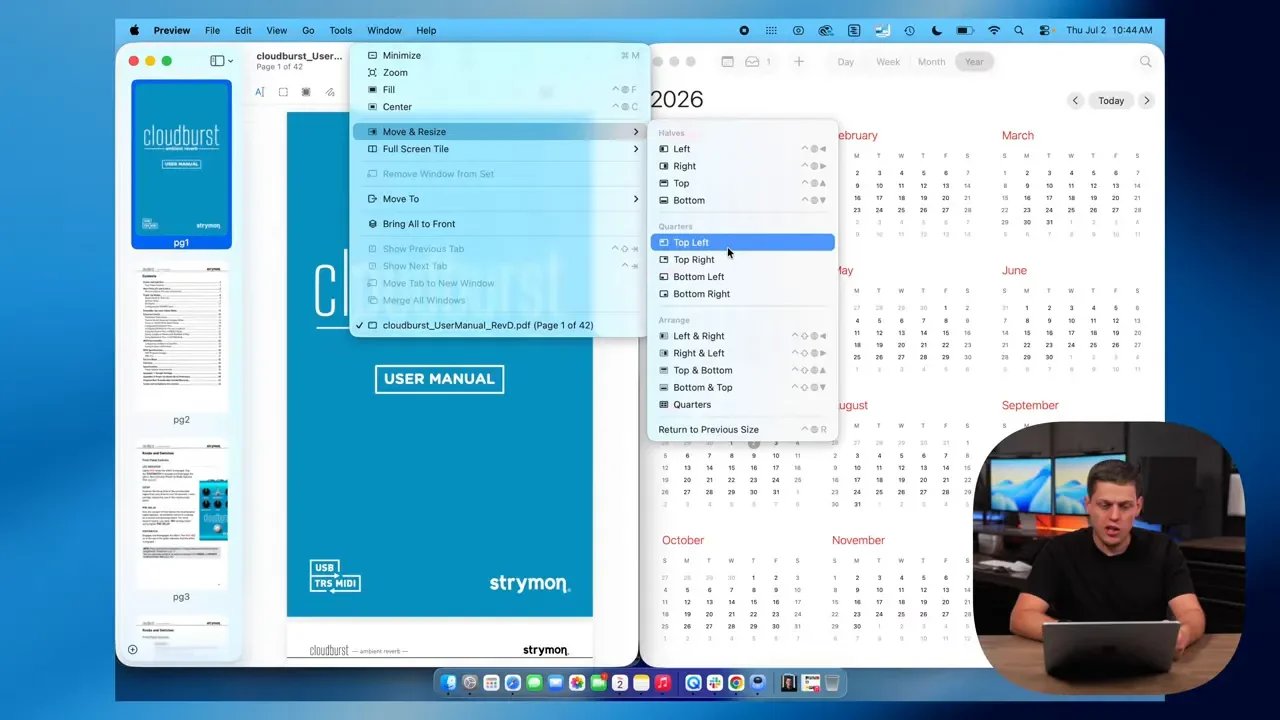
macOS can also place a window into one quarter of the screen. This is great when you need four apps visible or want a small utility window out of the way. There is no built-in keyboard shortcut for quartering by default. To do it manually, open the app's Window menu, select Move & Resize, then choose the quarter of the display where you want the app placed.
Command+W to Clear Clutter
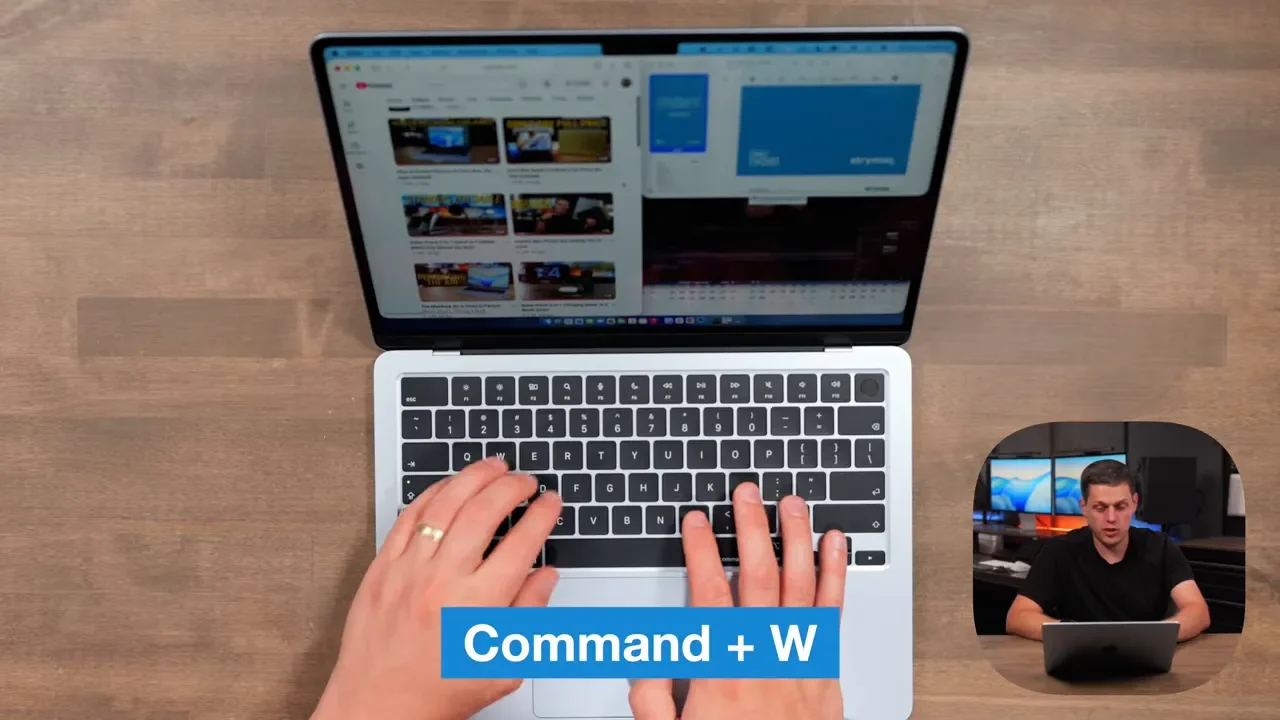
Before arranging a fresh workspace, it can help to get unnecessary windows out of the way. If an application is open and you are done with it, press Command + W to close it. This is a quick way to clear clutter before tiling the applications you actually need.
Setting Custom Quarter Shortcuts
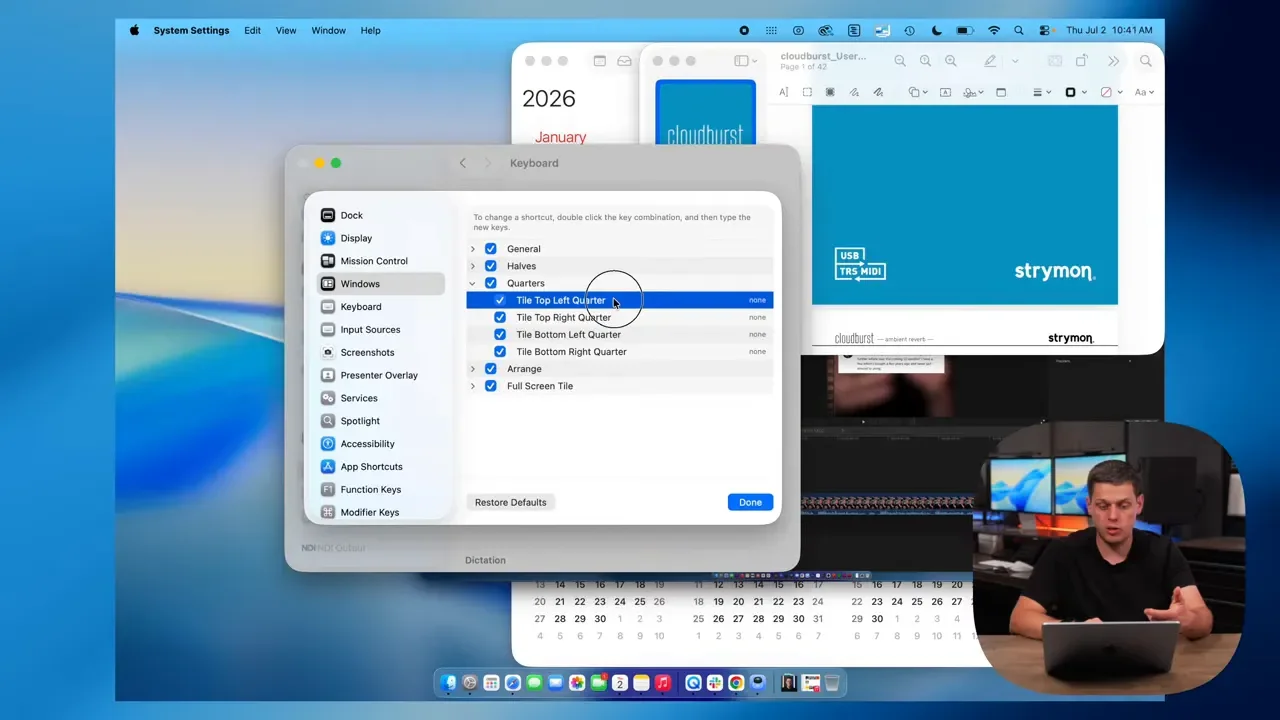
If quarter tiling becomes part of your workflow, set up your own shortcuts. Go to:
System Settings
Keyboard
Keyboard Shortcuts
Windows
Open the Quarters section. You can assign a separate key combination to each of the four screen corners. Double-click the existing key-combination field, then press the shortcut you want to use. Just make sure the shortcuts you choose do not conflict with commands you already use in macOS or your favorite apps.
Drag to Edge Method
If you do not have a Globe key or simply do not want to memorize shortcuts, drag a window to the edge of the display. macOS highlights the available tile zone when you reach the right area, and releasing the window snaps it into place. This is a perfectly solid method, especially when you are just getting started with window tiling. It is a little slower than the keyboard shortcut, but it is easy to understand because you can see exactly where the window will land.
Option Drag for Faster Snapping
There is one trick that makes drag-to-edge tiling much faster: hold Option while dragging the window. This brings up the highlight zone more quickly, so you do not have to work the cursor around the edge as much. If you remember only one alternative to the Globe + Control + Arrow shortcut, remember Option. It is the fastest way to start tiling when you are using the mouse or trackpad.
Green Button Menu Options
Another simple option is the green button in the upper-left corner of an app window. Clicking it opens the window-management menu, including Move & Resize choices. You can also choose Fill & Arrange. This automatically arranges the currently active applications, which can be really handy when several windows are open and you want macOS to quickly resize everything into a more useful layout. Hold Option after opening the green button menu to reveal a few additional choices.
Window Menu Method
You can reach the same tiling controls from the macOS menu bar. Select Window, then choose Move & Resize. Every main tiling option is there, including the quarter layouts. It works, but this is definitely the clunkiest method. Use it when you need an option you have not assigned a shortcut to, or when you simply prefer menu navigation.
Command+M to Minimize
If you want an app out of the way without closing it, press Command + M. That minimizes the current window to the Dock. This is useful when the app may be needed again soon, but it does not deserve one of your tiled spaces right now.
Apps That Don't Support Tiling
One weird quirk is that not every app plays nicely with macOS tiling. Some applications cannot resize themselves to exactly half the screen, depending on the app and the size of the display you are using. Apple Music is one example. It may not take up a true half-screen tile, which is inconvenient once you have gotten used to relying on the shortcut. macOS window tiling is great, but Apple still has some work to do to make every application behave consistently.
Quick Recap
Here are the practical Mac tiling controls to keep in mind:
Globe + Control + Arrow: move the active window to a screen half.
Shift + Globe + Control + Arrow: swap tiled applications.
Globe + Control + F: fill the desktop.
Globe + Control + C: center the active window.
Command + W: close an app to clear workspace clutter.
Command + M: minimize a window to the Dock.
Option while dragging: activate edge snapping faster.
For most workflows, the keyboard shortcut is the fastest method. If you do not have the required Globe key, Option-dragging is the next best move.
Final Thoughts and iPad Compatibility
Proper window tiling makes a Mac feel much more efficient, whether you are comparing documents, researching in a browser while writing notes, or trying to keep several work apps organized. Everything here also applies to iPad, and it makes using an iPad with a keyboard a much better experience. A good keyboard setup turns those tiling shortcuts into something you can use constantly instead of a feature you only reach for occasionally. If you are putting together a keyboard-based Apple workspace, take a look at my desk setup and browse my recommended gear and video kit.