Mac Spaces Explained: The Multiple Desktop Feature You’re Not Using
Some of the links in this post are affiliate links, which means I may earn a small commission if you choose to make a purchase at no extra cost to you. As an Amazon Associate, I earn from qualifying purchases. Read my full Ethics & Affiliate Relationship Disclaimer.
macOS Spaces is one of those features that can completely change how you work once it clicks. Each Space is an independent desktop with its own windows, layout, and even wallpaper. Instead of constantly minimizing apps, closing windows, or digging through a messy desktop, you can move instantly between focused setups. Keep work in one Space, research and browsing in another, communication apps in a third, and personal stuff somewhere separate. Everything stays open exactly where you left it.
Table of Contents
What Are Spaces?
Spaces are multiple desktops built into macOS. Think of each one as its own workspace, not just another screen full of the same clutter. A Space can contain a separate set of apps and windows, a different arrangement, and a different wallpaper. You can move between them without closing or minimizing anything, which makes it much easier to stay focused on the task in front of you.
For example, a simple setup could look like this:
Space 1: Work apps and active projects
Space 2: Browser tabs, research, and reference material
Space 3: Email, messages, and communication apps
Space 4: Personal browsing and non-work tasks
The goal is not to create a dozen desktops. It is to give different types of work a dedicated place so your Mac feels organized instead of chaotic.
Create a Space by Full Screening an App
The easiest way to create another Space is to full screen an app. Open any application and click its green button in the upper-left corner of the window. macOS immediately places that full-screen app into its own Space. From there, you can swipe between your original desktop and the full-screen app without having to manage windows manually. When you are done, hover over the green button again and choose Exit Full Screen. The app returns to the Space it came from.
Using Mission Control
Mission Control is the control center for Spaces. It shows your open windows and the available Spaces across the top of the screen, making it easy to create, organize, and move between desktops. Open Mission Control by swiping up with three fingers on your trackpad. You can also press F3, or double tap with two fingers on a Magic Mouse.
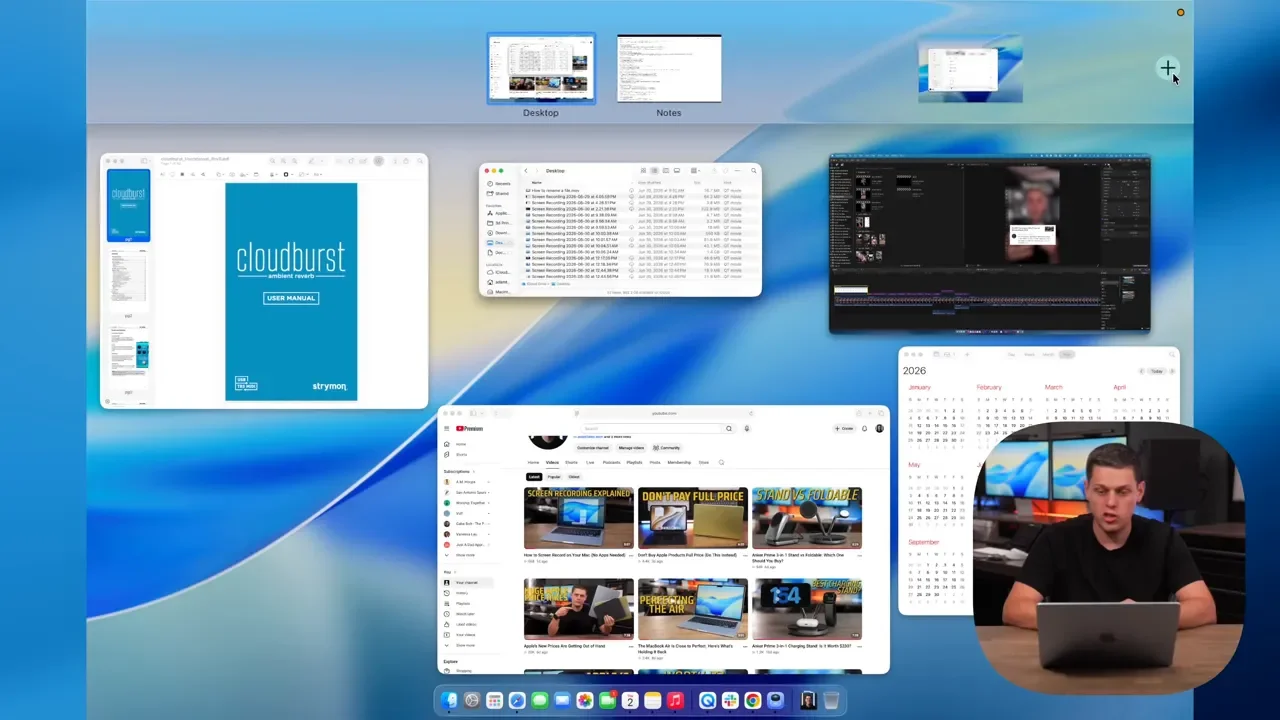
Once Mission Control is open, you have two good ways to make a new Space:
Click the plus button in the upper-right corner.
Drag an open app or window toward the Spaces area at the top to create a new desktop for it.
You can also reorder Spaces directly in Mission Control. Just drag the desktop thumbnails into the order that makes the most sense for your workflow.
Keyboard Shortcuts and Trackpad Gestures
The fastest way to use Spaces is to stop treating them like a menu you need to open every time. Build the movement into your normal workflow. My favorite way to switch Spaces is a three-finger horizontal swipe on the trackpad. It is quick, natural, and makes moving from work to research or communication feel instant.
You can also use the keyboard:
Control + Left Arrow: Move to the Space on the left
Control + Right Arrow: Move to the Space on the right
F3: Open Mission Control
If you use a Magic Mouse, double tapping with two fingers opens Mission Control as well. Use whichever method feels most natural, but the trackpad gesture is tough to beat once it becomes muscle memory.
Full Screen vs Windowed Spaces
Spaces do not require every app to be full screen. You can use a full-screen app in its own Space, or keep apps in regular windowed mode inside a desktop. Full screen is great when you want total focus, like writing, editing, or working inside one app. Windowed Spaces are better when you want several apps available together, such as a browser, notes, messages, and a file manager. The best setup usually uses both. Give highly focused work its own full-screen Space, then create windowed desktops for tasks that naturally involve multiple apps.
Moving Windows Between Spaces
On a single display, moving a window between Spaces is simple. Click and drag the window toward the edge of the screen, and it can slide into the next Space. With multiple monitors, this does not always behave as cleanly. In that situation, Mission Control is the more reliable way to move windows. Open it, then drag the window onto the Space where you want it to live. That gives you a much clearer view of what is already open and prevents a window from ending up somewhere you did not intend.
Assign Apps to Specific Spaces
You can tell macOS where an app should appear by assigning it to a particular Space. This is useful for apps that always belong in the same place. Right click an app in the Dock, choose Options, then open Assign To. From there, choose a specific desktop or make the app available on every desktop.
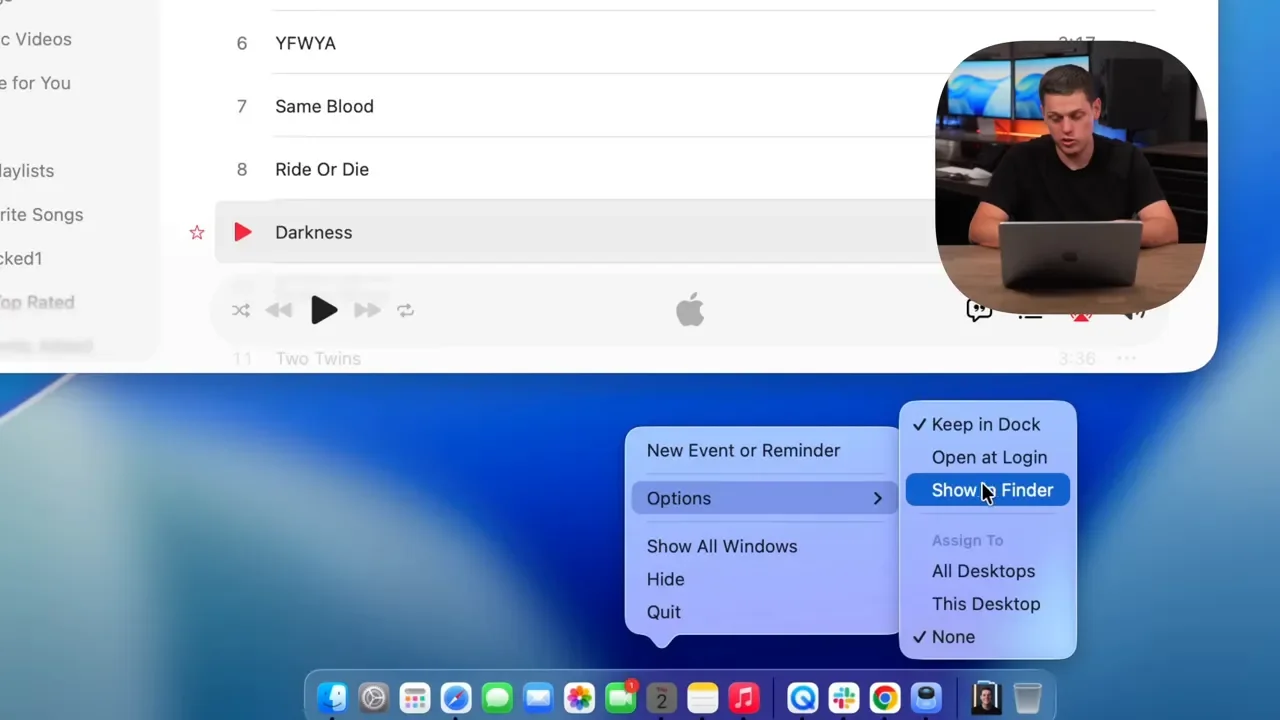
Assigning an app to all desktops is especially useful for something like Apple Music. You can keep your music controls available regardless of which Space you are working in, while everything else stays compartmentalized.
Fastest Way to Create a New Space
If you need an app in its own workspace right now, full screen it. Clicking the green button is the fastest path because macOS automatically creates a dedicated Space for that application. There is no need to open Mission Control, add a desktop, and then move the app over. Full screen the app and the Space is created for you. This is especially handy when you need a short burst of focus. Put the app in full screen, finish the task, then exit full screen to return it to its original desktop.
Custom Wallpaper Per Space
Different wallpapers are a simple but surprisingly effective way to know exactly where you are. A visual cue makes it much easier to avoid accidentally opening personal apps in a work Space or dropping work windows into the wrong desktop. To set a wallpaper for the current Space, right click the desktop and select Change Wallpaper. The important part is to make sure Show on All Spaces is turned off. Otherwise, changing the wallpaper affects every Space instead of only the one you are in.
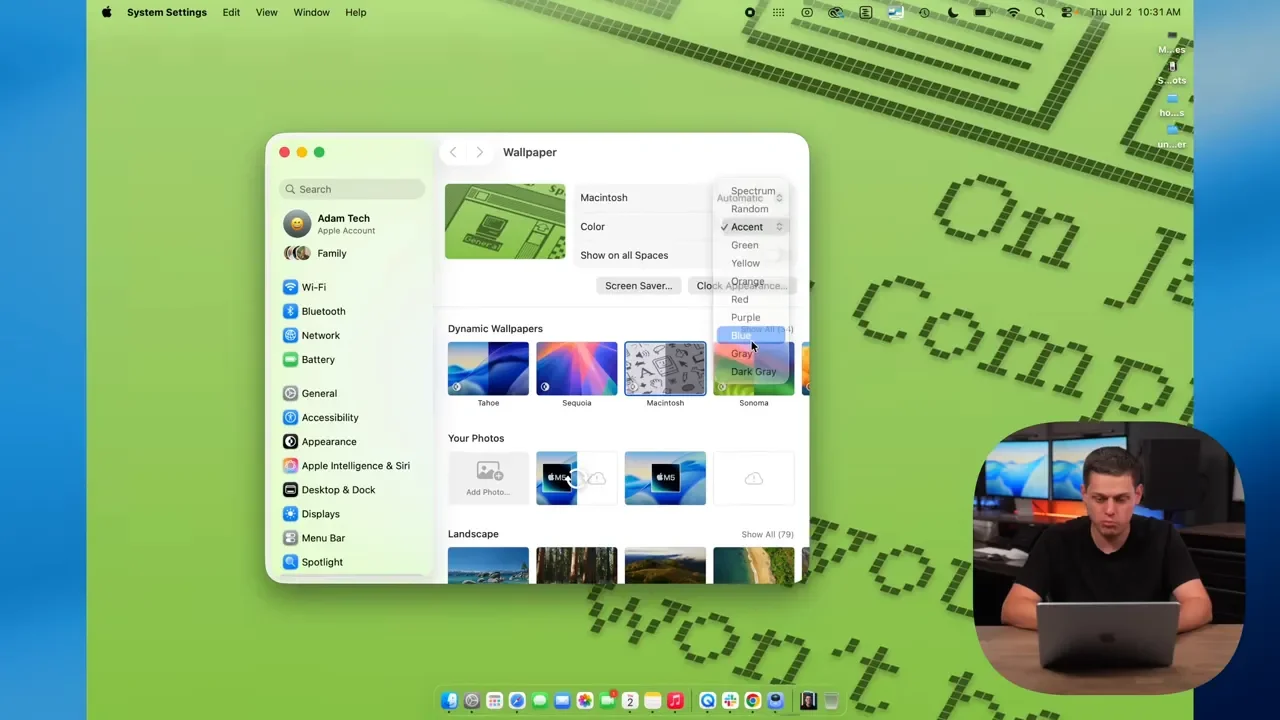
You might use a clean blue wallpaper for work, a bright color for communication, and something more personal for your last desktop. The exact choices do not matter. What matters is that each Space is immediately recognizable when you swipe into it.
Tips for a Great Spaces Setup
Keep the system simple. Three or four Spaces is usually the sweet spot. Once you create too many, navigation starts becoming slower and the whole point of organizing your desktop gets lost.
A practical structure is:
First Space: Work apps and tasks that need your full attention
Second Space: Browser, research, and reference material
Third Space: Communication, email, and messages
Last Space: Personal apps and browsing
Do not put everything in Space 1. That defeats the purpose. The real benefit comes from separating categories of work so each desktop has a clear job. It takes a few minutes to get used to moving through Spaces, but once you have a setup that fits how you work, it becomes hard to go back to one crowded desktop.
Tiling Shortcuts Inside Spaces
Spaces help organize your work across desktops, while tiling helps organize the windows inside the desktop you are currently using. Combine the two and your setup gets even cleaner.
You can use tiling shortcuts to position apps side by side:
Function + Control + Left Arrow: Tile the active window on the left side
Function + Control + Right Arrow: Tile the active window on the right side
Hold Shift: Swap the tiled applications back and forth
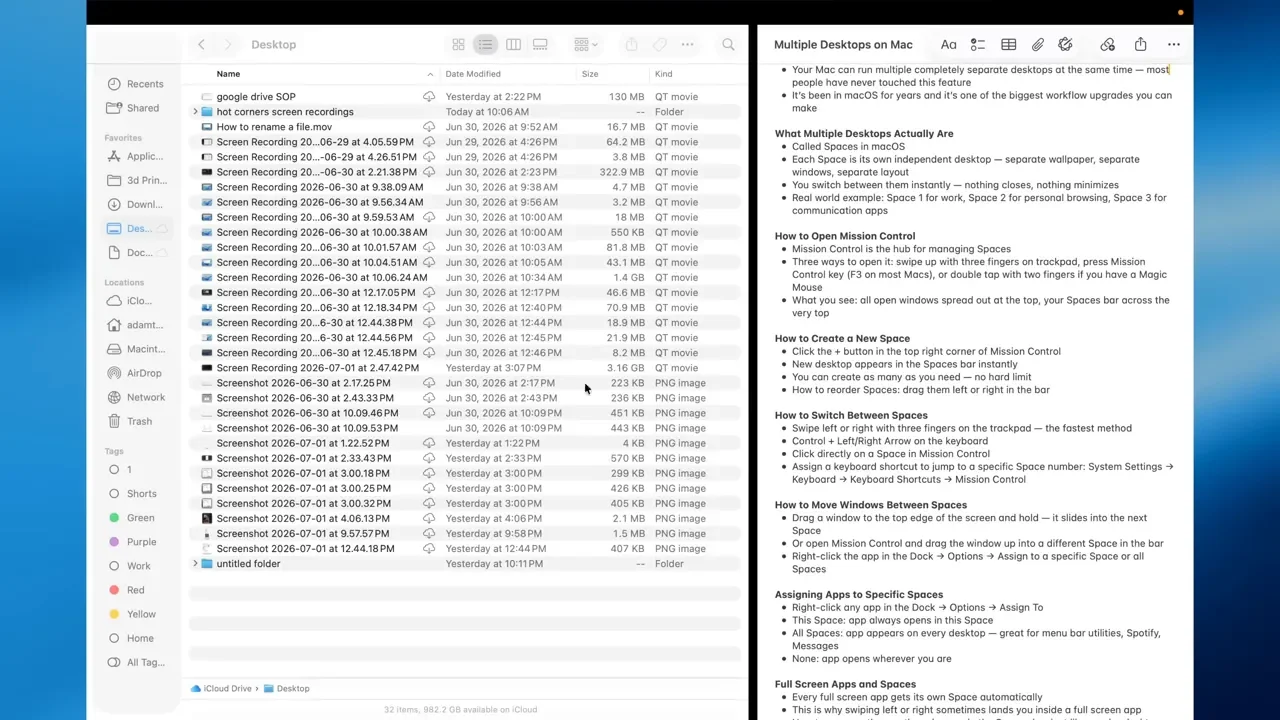
This works well for research and writing, file management, email, or anything where you need two apps visible together. You can also use Split View to keep multiple applications neatly arranged within one Space.
Final Thoughts
Spaces have been in macOS for a long time, but they are still one of the best ways to make a Mac feel more organized and more focused. The workflow is simple: separate your work into a few intentional desktops, use quick gestures or keyboard shortcuts to move between them, and keep every Space focused on one kind of task. For a closer look at the desk setup behind this workflow, check out my desk setup. For the tools and equipment I use, browse my gear recommendations. Once Spaces becomes part of your routine, it can permanently change the way you work on a Mac.