How to Transfer Everything to a New MacBook (The Fast Way)
Some of the links in this post are affiliate links, which means I may earn a small commission if you choose to make a purchase at no extra cost to you. As an Amazon Associate, I earn from qualifying purchases. Read my full Ethics & Affiliate Relationship Disclaimer.
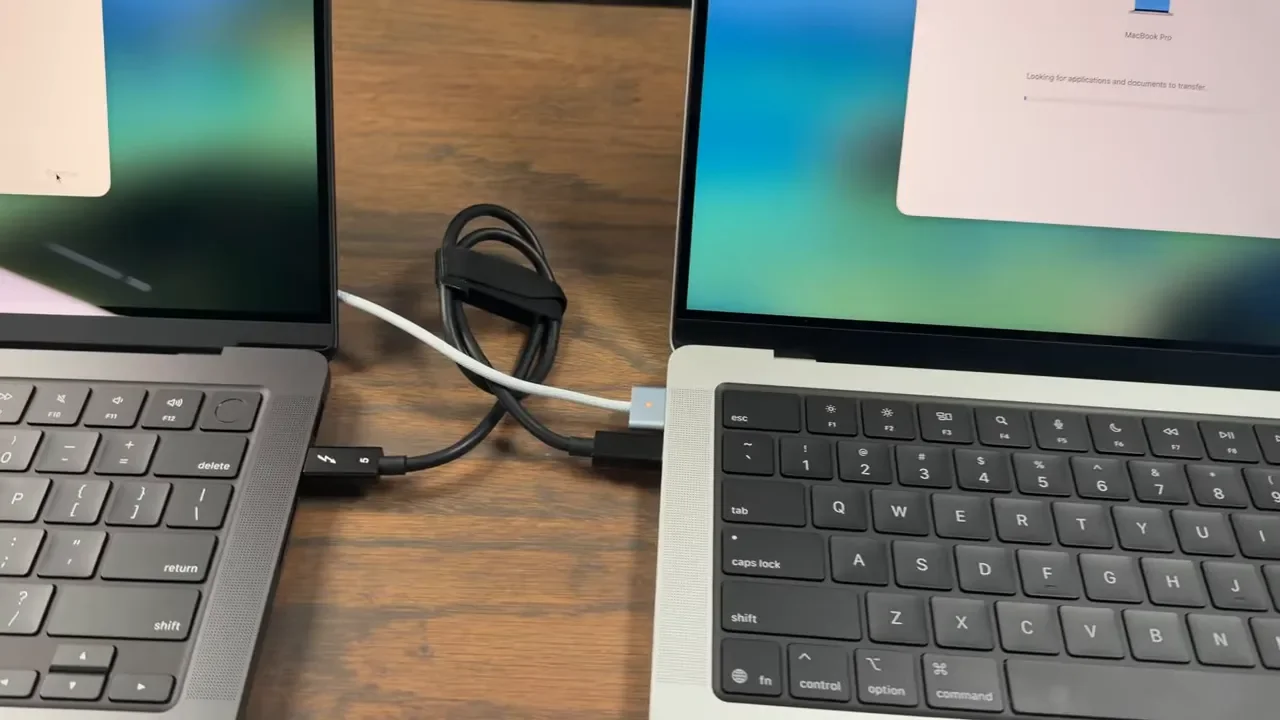
Getting a new MacBook is one of those things that feels exciting right up until you think about moving everything over. The good news is Apple makes this pretty painless. If you use Migration Assistant during setup, your new Mac can end up looking almost identical to the old one, with the same apps, files, and settings already in place. The biggest trick is not the transfer itself. It is doing it the fast way. If you connect the two Macs with a Thunderbolt or USB-C cable instead of relying only on Wi-Fi, the whole process usually goes much faster.
Table of Contents
What You Need Before You Start
Before starting the transfer, it helps to have a few things ready:
Your old MacBook
Your new MacBook
A Wi-Fi connection
Power connected to both computers
Ideally a Thunderbolt, USB4, or USB-C cable for faster transfer speeds
If you are still deciding which Mac to buy, the personalized Mac recommendations page is a helpful place to narrow it down. For the fastest handoff, a proper data cable matters. A Thunderbolt or USB4 cable is the best option. A regular USB-C data cable can still help a lot. Apple charging cables can work more slowly, so they are not the best choice if speed is the goal.
Start The Transfer During New Mac Setup
On the new MacBook, go through the normal first-time setup until you reach the part where macOS asks whether you want to transfer information. Choose the option to move data from a Mac, Time Machine, or startup disk. That tells the new computer you want to pull your files and settings from another machine instead of starting from scratch. After that, connect the new Mac to Wi-Fi so it can continue through setup and discover the other computer.
Open Migration Assistant On Your Old Mac
On the old MacBook, open Migration Assistant. The quickest way is to press Command + Space, type Migration Assistant, and launch it from Spotlight. One thing to know before clicking through: opening Migration Assistant will close out any apps you currently have open. So if there is anything unsaved, take care of that first. Once Migration Assistant opens on the old Mac, choose Transfer To Another Mac, then continue.
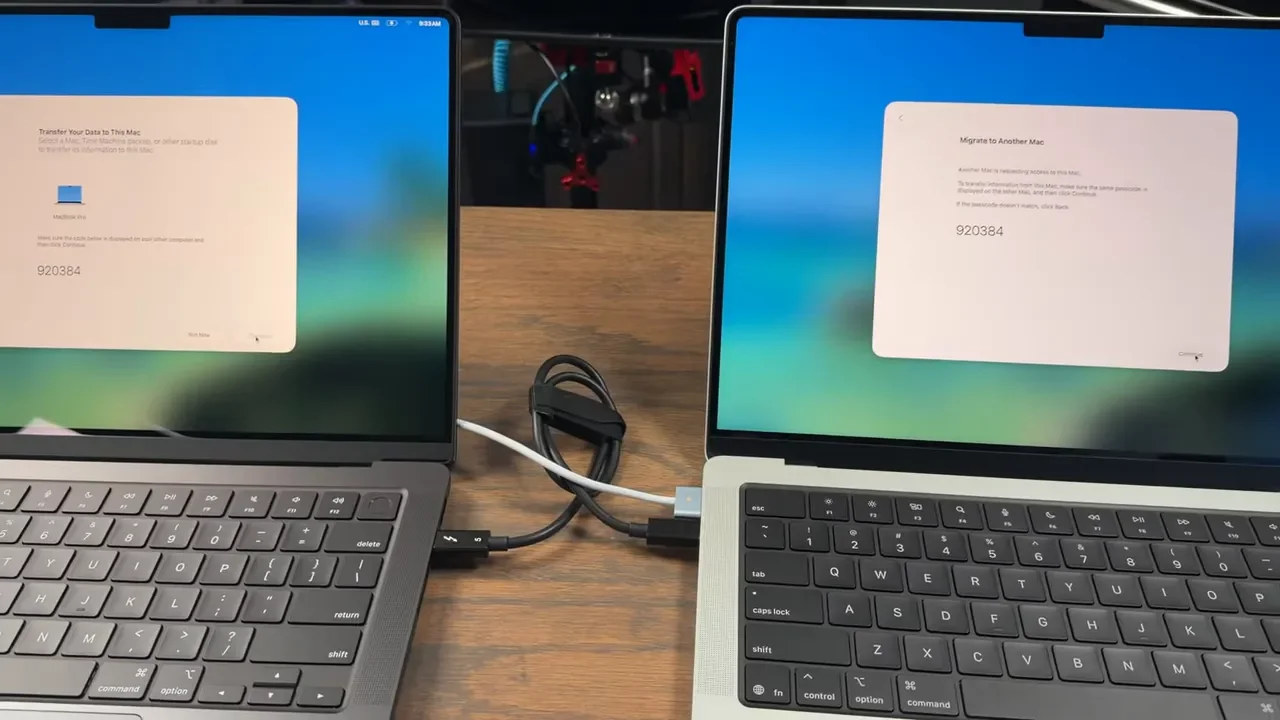
Connect The Two Macs And Verify The Pairing
Now go back to the new Mac. It should detect the old computer as a source. Select it, then confirm that the security code shown on both machines matches. You need to approve that pairing on the old Mac before the transfer can continue. Once the codes are confirmed, the new Mac will begin scanning the old one for the information it can move over.
The Speed Trick That Makes A Big Difference
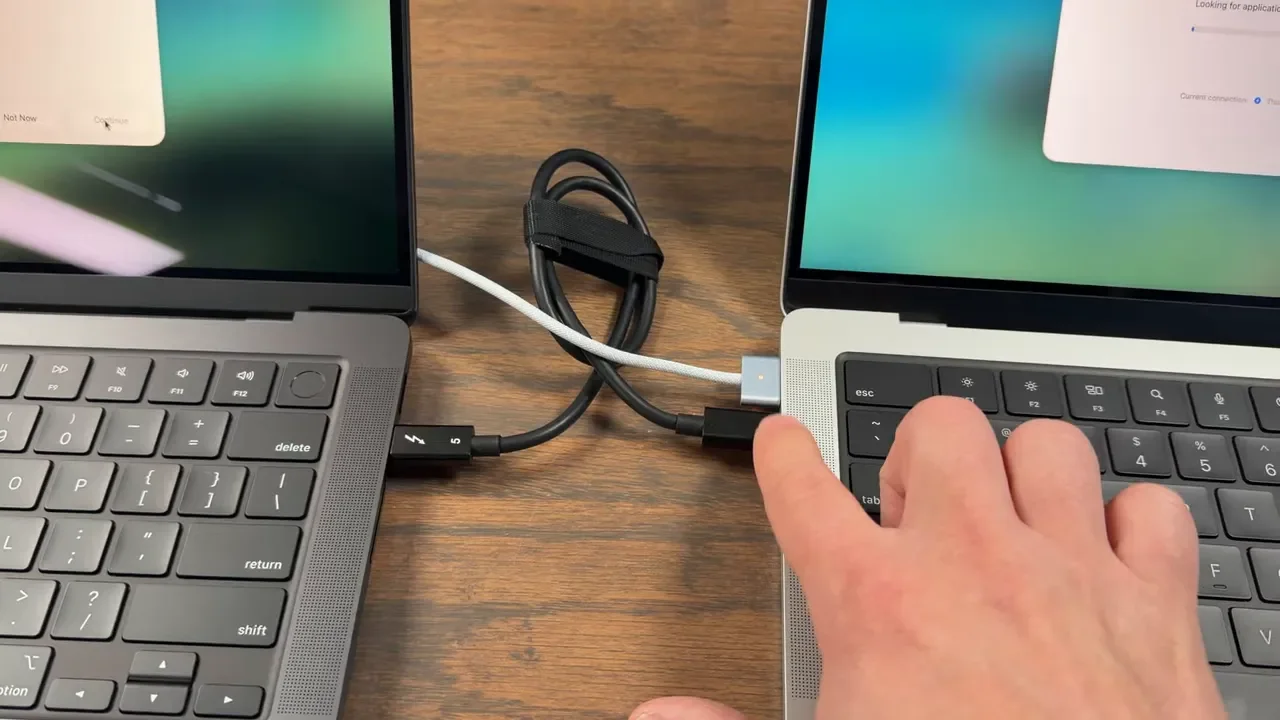
If you only remember one thing, make it this: use a cable. Wireless migration works, but it is usually much slower than a direct wired connection. A Thunderbolt cable is ideal. A USB4 cable is also great. Even another USB-C cable that supports data transfer is usually better than doing the whole thing over Wi-Fi. When the connection switches over to Thunderbolt, macOS will typically show that the migration is using that faster link. That is exactly what you want.
Also, keep both computers plugged into power. Transfers can take a while, and the last thing you want is a battery warning in the middle of moving your entire setup. If you need extra gear for this kind of setup, a good external SSD, a list of favorite Mac accessories, a reliable laptop charger, and a solid laptop power bank can all make Mac setup a lot easier.
Choose What To Transfer
Once the Macs are connected and communicating, the old Mac will present the data that can be moved. This can include user accounts, applications, system settings, and folders. If you want the new MacBook to feel like a clone of the old one, you can bring over basically everything. That includes the settings that make your Mac feel familiar day to day. During this part of the process, macOS may ask you to create or confirm a password for the administrator account. Make sure you set that up before continuing.
Accept The Remaining Prompts And Start The Migration
From there, you will work through a few normal setup prompts, including the software license agreement and any account-related confirmations. Once those are done, the transfer begins. macOS may show an estimate that looks pretty long. Ignore it for the most part. Those time estimates are often not very accurate, especially early in the process. It may claim the transfer will take hours, then finish much sooner than expected. The progress bar is useful. The clock estimate usually is not.
What To Expect When It Finishes
When the migration is done, macOS will let you know the process completed successfully. In some cases, you may see a warning saying certain documents could not be transferred. That sounds worse than it usually is. In practice, those warnings are often minor, and it is common to find that everything important made it over just fine. The smart move is to use the new computer normally for a bit and make sure your files, apps, and settings are all there before wiping the old Mac.
Do Not Erase The Old Mac Right Away
Even if everything looks good, give yourself a little time before erasing the original machine. Open the apps you use most. Check your documents. Make sure desktop files, downloads, photos, and other important folders are all where they should be. Once you are confident nothing is missing, then you can safely reset or sell the old computer.
Final Step: Sign In To iCloud
After setup is finished, you will still need to sign in to your iCloud account on the new MacBook. That is the last little piece that ties everything together. Once that is done, your new Mac should feel almost exactly like the old one. Same apps. Same files. Same overall setup. That is really the goal here: upgrading hardware without having to rebuild your whole workflow from scratch.
MacBook Picks Mentioned In The Description
If you are comparing models before or after migrating, these links cover the main MacBook options:
Additional Resources
If you want to see the original walkthrough, here is the full migration tutorial. For a look at the desk and recording environment behind this setup, check out the desk setup video. If you are curious about the broader gear used for creating content and testing tech, the full video making kit covers it. You can also find more tech recommendations and resources on the main website.